
How to clean your grippers
Let us demystify the gripper cleaning process. With only a few simple supplies and a little elbow grease, you can achieve this kind of before and after result!

Step 1: Gather your cleaning supplies

The mandatory supply list is as follows:
- Stiff-bristle wire or nylon brushes
- Oil such as 3-in-1 (WD-40 works in a pinch)
- Bucket of hot soapy water
- Soft cloth (i.e. old t-shirt) or paper towels
A decent stiff-bristle brush and the oil are non-negotiable. If you don't have those items then we sell a convenient Gripper Cleaning Kit.
Any similar stainless steel or brass brushes will work. In a pinch a standard fingernail brush or even a repurposed toothbrush can get the job done.
Also pictured above are some bottle brushes and a small brass wheel meant for a Dremel. These are honestly overkill but make quick work of cleaning springs if you have a lot of grippers. Fine steel wool is helpful if you have rusty springs.
Step 2: How to handle filthy handles

Given the amount of dust and grime that will come off the handles, it's best to clean them before the spring. Our example gripper has some some serious chalk, skin, blood, sweat and possibly even tears all caked into the handles.
Chalk alone brushes off pretty readily, but when the handles get to this point of seasoning, it's actually pretty resilient. This is where the stainless steel or brass brush really helps. Resist the urge put the gripper straight into your soapy water.

Brush on the diagonals that follow the direction of the knurling. Stainless steel bristles will not damage the knurling but may scratch anodized color. Brass bristles are softer and pose less of a risk of scratching color. Nylon is the safest, but the least effective for tough jobs. Use the softest bristle that is effective.
Look for any discoloration in the knurling. That is usually grime or chalk that can still be brushed off. If your brush really isn't doing the job, you may need to just move on to the wet phase of cleaning.

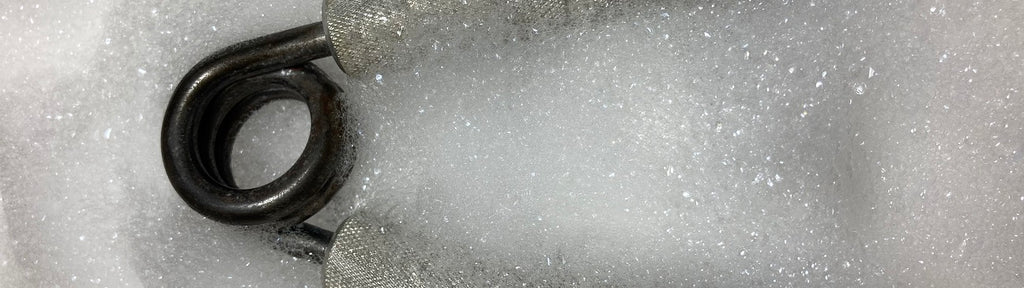
Okay, listen up! Don't get wild here with the cleaning supplies and chemicals. They are not necessary. All you need is good old hot soapy water. Do not, for example, put vinegar in the water. Use the nylon bristle brush to scrub the handles.

Once you're satisfied the gripper is clean, rinse it off and dry thoroughly with paper towels. Really work the paper towel around in the spring and remove any moisture and grime. If you have an air compressor, feel free to blast air all over the spring to get the gripper 100% dry.

Usually this is the most satisfying step. One note is that handles that are left to get really filthy can usually be restored to new condition. But if a spring is neglected or allowed to rust, then it may be permanently discolored. The best offense is a good defense. Oil and wipe springs often (like every other workout) to keep them clean and fresh. It only takes a second. Oil and paper towels are cheap!
Worth the effort!

Cleaning your grippers has many advantages. Knurling will feel sharper when kept free of caked on chalk and grime. If your grippers are rated, then keeping the springs clean is the best way to preserve that rating for repeatability in your training.
Also, clean springs don't squeak!
